Mount Kilimanjaro rises above everything else in Africa. It’s the tallest free-standing mountain in the world. Climbing it is a dream for many. It’s also a big challenge. While you don’t need ropes or technical skills, you do need the right gear. The mountain has many faces—hot trails, freezing summit nights, sudden rain. Good equipment keeps you warm, dry, and strong enough to keep going.

Here’s a simple, thorough checklist to help you prepare for a safe and successful climb.

Why Packing Smart Matters?

You’ll spend days on your feet. Nights can drop well below freezing. Days can be hot and dusty. If you don’t pack well, small problems become big ones—blisters, chills, exhaustion.

Climbers often say the gear you bring can make or break the trip. Good preparation lets you focus on the beauty around you instead of feeling cold or worn out.

Build Your Clothing System

Layering is everything. You’ll start warm at lower altitudes, then move into cold, thin air near the top. Layers let you adjust quickly.

Base Layers

These pull sweat off your skin so you don’t get chilled later.

Pack:

  • 2–3 moisture-wicking shirts (synthetic or merino wool)
  • 2 warm thermal tops
  • 2–3 pairs of thermal leggings

Avoid cotton. It stays wet and cold.

Mid Layers

These trap heat as you gain altitude.

Pack:

  • 1–2 fleece pullovers
  • A warm insulated jacket (synthetic or down)

You’ll wear the insulated layer every night and on summit day.

Outer Layers

These block wind and rain.

Pack:

  • Waterproof jacket with a hood
  • Waterproof pants

Check that they fit over your other clothes without feeling tight.

Trekking Pants and Shorts

Bring:

  • 1–2 pairs of lightweight hiking pants
  • Optional: zip-off pants for warmer days

Hats and Gloves

Heat leaves your body fast through your head and hands.

Pack:

  • Warm beanie or wool hat
  • Sun hat
  • Neck gaiter or buff
  • Thin liner gloves
  • Insulated gloves or mittens for summit night

Footwear

Your boots are your foundation. Choose them carefully.

Hiking Boots

Must be:

  • Waterproof
  • High-ankle
  • Broken in before the climb

Try them on with your thickest socks.

Camp Shoes

Bring sandals or light sneakers for evenings in camp. Your feet will thank you.

Socks

Pack:

  • 3–4 pairs of trekking socks (medium weight)
  • 1–2 pairs of thick mountaineering socks for summit night

Merino wool helps prevent blisters and smells less.

Sleeping Gear

Cold nights are part of Kilimanjaro. Sleep warm.

Sleeping Bag

Choose:

  • A 4-season bag rated to -10°C (14°F) or colder

You can rent one, but bringing your own often feels cleaner and more comfortable.

Sleeping Pad

If you’re camping, a good pad keeps you off the cold ground.

Trekking Accessories

These small items can make long days much easier.

Trekking Poles

They protect your knees on descents and help balance. Practice using them before you go.

Headlamp

You’ll start summit day in the dark.

Bring:

  • A good headlamp
  • Extra batteries

Sunglasses

Choose UV-protective lenses with side coverage. Snow glare can be intense.

Water Bottles and Bladder

You need 3–4 liters of water daily.

Tip:

  • Keep a bottle inside your jacket on summit night so it doesn’t freeze.

Gaiters

Handy for mud or scree sections.

Backpacks and Bags

Stay organized to save energy.

Daypack

Size:
 25–35 liters with a hip belt

Carry:

  • Water
  • Snacks
  • Layers
  • Camera
  • First aid

Duffle Bag

Porters will carry this for you. Waterproof models work best.

Dry Bags

Use them to separate and protect clothes and electronics.

Health and Hygiene

Staying clean and healthy helps keep your spirits up.

First Aid Kit

Include:

  • Blister plasters
  • Painkillers
  • Rehydration salts
  • Diamox (if prescribed)
  • Bandages and antiseptic

Toiletries

Pack:

  • Toothbrush and toothpaste
  • Biodegradable soap
  • Hand sanitizer
  • Quick-dry towel

Sunscreen and Lip Balm

Choose high-SPF options to protect from the strong equatorial sun.

Personal Medications

Bring extra doses and keep them in your daypack.

Snacks and Hydration

While meals are provided, extra snacks help keep your energy steady.

Bring:

  • Energy bars
  • Trail mix
  • Hard candies for dry throat
  • Electrolyte tablets

Other Handy Items

  • Notebook and pen
  • Camera or smartphone
  • Spare batteries and a power bank
  • Small book or cards
  • Earplugs (camps can be noisy)

Tips for Packing Smart

  • Test your gear.
    Make sure everything fits and works before your trip.
  • Pack light.
    Bring only what you need. Extra weight adds up.
  • Organize your bag.
    Use stuff sacks to sort gear by category.

How to Stay Comfortable

Even the best gear can’t do everything. Here are a few habits that help:

  • Layer up early.It’s easier to stay warm than to warm up again.
  • Keep feet dry.Change socks daily and air boots overnight.
  • Eat and drink often.Small, steady fuel keeps energy up.
  • Stretch in the evenings.It helps with recovery.

Staying Mentally Ready

Summit night is long. You’ll start before midnight. The cold can feel endless. Every step is slow. But with the right mindset, you can keep going:

  • Break the climb into small sections.
  • Focus on your breathing.
  • Think about why you came.
  • Remind yourself: this is temporary, but the memory lasts forever.

Final Thoughts

Climbing Kilimanjaro is more than a trek. It’s a personal journey. Each day brings new challenges. Good gear is your ally, keeping you warm, safe, and ready for what comes next. When you stand on the summit and see the sunrise, you’ll feel the reward of all your preparation. Pack smart. Train well. Take it one step at a time. And enjoy every moment on Africa’s highest peak.
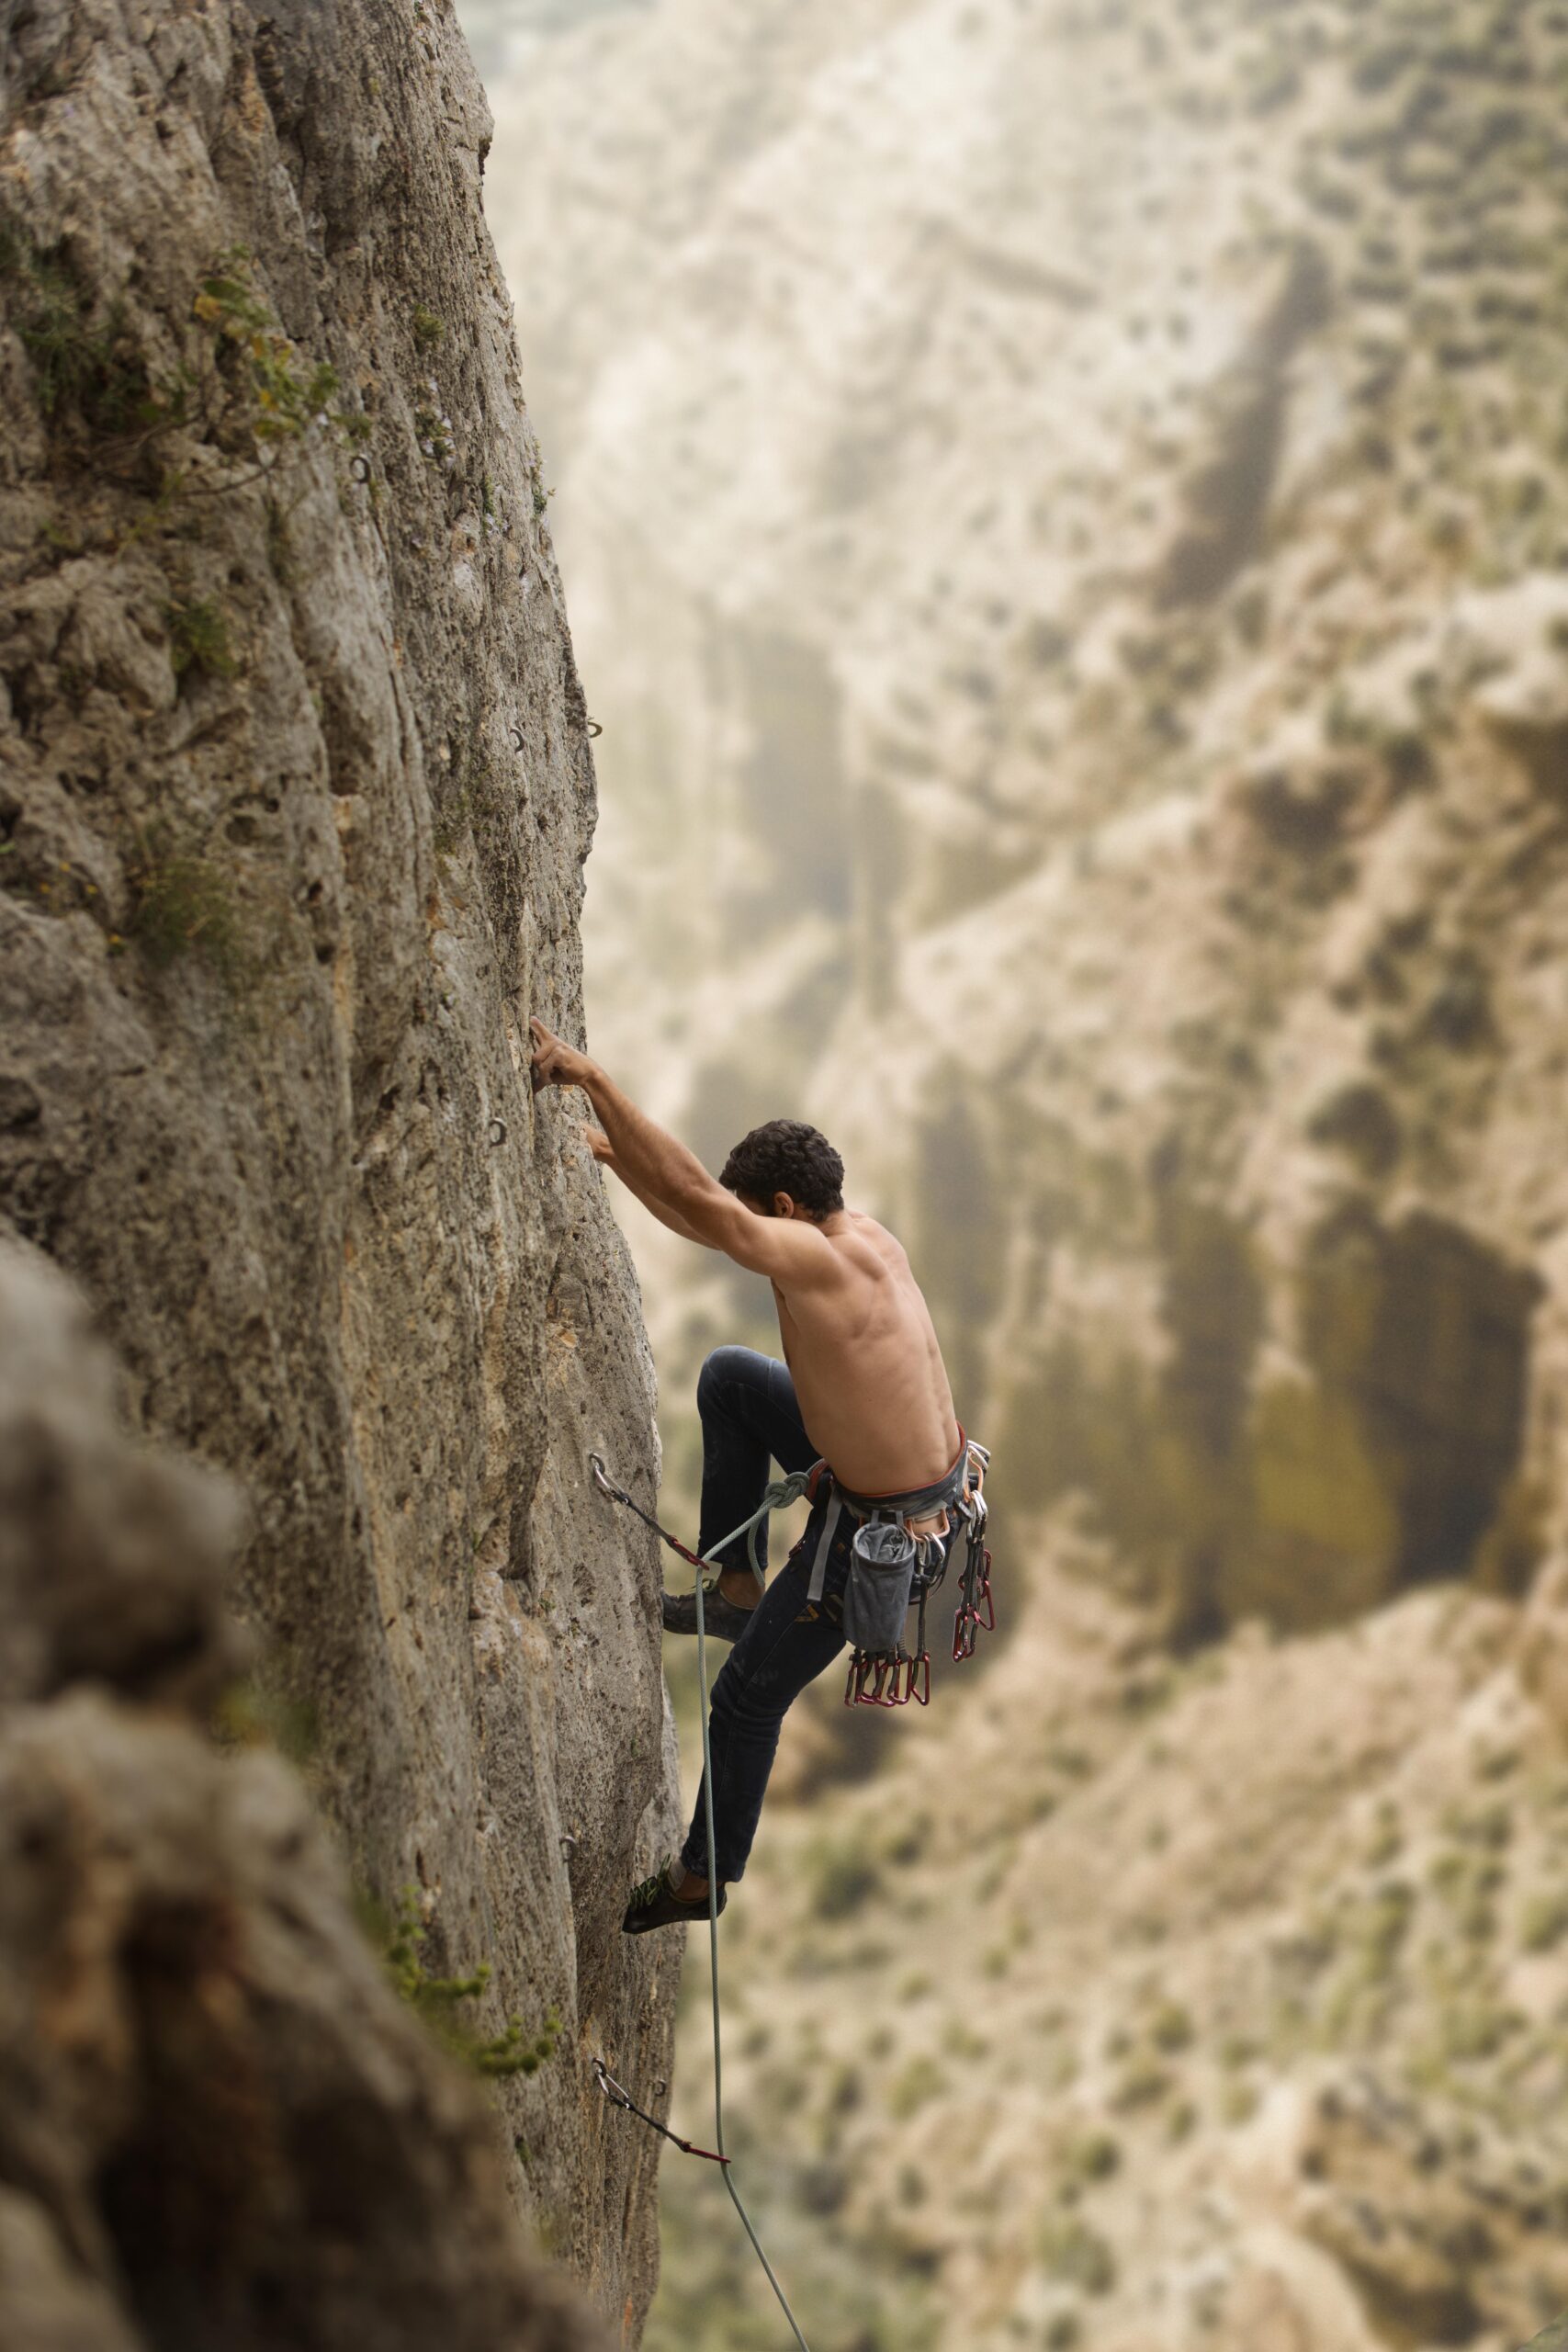
Mount Kilimanjaro is one of the world’s most iconic peaks. Rising to 5,895 meters, it’s the tallest free-standing mountain on Earth. Every year, thousands of trekkers set out to stand on Uhuru Peak. Some make it. Many turn back.

Getting to the summit isn’t just about putting one foot in front of the other. Success depends on how well you prepare your body and your mind. Climbing Kilimanjaro is a big goal, but with the right plan, you can give yourself the best chance to reach the top safely.

Let’s walk through what you need to know to get ready, inside and out.

What Makes Kilimanjaro Different?

Unlike many high mountains, Kilimanjaro doesn’t require technical climbing. You won’t need ropes, harnesses, or crampons. But that doesn’t mean it’s easy. What makes this trek so tough is the altitude. You start low and gain elevation quickly. Many trekkers feel the effects at 3,500 meters, headaches, nausea, fatigue. By 5,000 meters, every step can feel like a huge effort.

This means fitness alone isn’t enough. You have to learn to move slowly, listen to your body, and stay calm when things get hard.

Start Training Early

The earlier you begin, the better. Aim to start training at least three to four months before your trek.

Cardio is essential. Hiking for hours each day demands stamina. Running, cycling, and swimming are all helpful. Try to do cardio workouts 3–4 times per week.

Leg strength matters. Steep ascents and descents can wear you down. Include lunges, squats, and step-ups in your routine. If you have stairs nearby, climb them with a loaded backpack.

Practice carrying weight. On Kilimanjaro, porters carry most of your gear, but you’ll still have a daypack. Train with 5–7 kg so you’re comfortable.

Hike whenever you can. Weekend hikes on trails and hills are the best preparation. They train your muscles, get you used to uneven ground, and toughen your feet.

Focus on Altitude Conditioning

You can’t fully simulate high altitude at home, but you can improve your body’s ability to use oxygen.

  • Do cardio workouts that challenge your lungs. Interval training (short bursts of effort) helps build endurance.
  • Spend time at moderate altitudes if possible. Even sleeping at 2,500–3,000 meters a few times can help your body adapt.
  • Learn to pace yourself. On Kilimanjaro, the mantra is “pole pole”, slowly, slowly. It’s not a race.

Build a Strong Core and Back

Your pack might not feel heavy at sea level, but at 4,000+ meters, everything feels harder. A strong core helps you stay balanced and reduces back strain.

  • Add planks, bridges, and back extensions to your workouts.
  • Practice standing on one leg to improve balance.
  • Do yoga or stretching sessions to keep your muscles flexible.

Prepare Mentally for the Challenge

Climbing Kilimanjaro is as much a mental game as a physical one. Some days will feel long and uncomfortable. Being ready for that can make a big difference.

Visualize success. Picture yourself walking slowly up the trail, feeling strong and steady. Imagine standing on the summit as the sun rises.

Break the climb into small steps. Don’t think about the whole mountain. Focus on getting to the next break or camp.

Practice staying positive. When you feel tired or discouraged, remind yourself why you’re there. Small phrases like “one step at a time” or “I’m stronger than I think” help a lot.

Accept discomfort. You will feel out of breath. You will probably have headaches. Knowing that ahead of time keeps you calm.

Choose the Right Route

Some routes are longer and give you more time to acclimatize. The longer you spend on the mountain, the better your chances of reaching the top.

Popular routes include:

  • Machame Route (6–7 days):Beautiful and varied but steep in places.
  • Lemosho Route (7–8 days):Great acclimatization with fewer crowds.
  • Rongai Route (6–7 days):Approaches from the north, drier but less  scenic.
  • Marangu Route (5–6 days):Easier terrain but faster ascent, so more risk of altitude issues.

If this is your first time at high altitude, pick a route with at least seven days.

Learn to Walk Slowly

It sounds simple, but moving slowly is one of the hardest skills for many trekkers to learn.

Practice “pole pole.” On your training hikes, slow down your pace until it feels almost too easy. Breathe deeply and take steady steps.

On Kilimanjaro, guides will remind you again and again to slow down. Trust them, it works.

Get the Right Gear

Comfort and safety depend on having the right equipment. Invest in good gear and break it in before your trip.

Key items include:

  • Hiking boots:Waterproof, well broken-in, with ankle support.
  • Clothing layers:Base layers, fleece, insulated jacket, waterproof shell.
  • Warm hat and gloves:Summit nights are freezing.
  • Sleeping bag:Rated to at least -10°C (14°F).
  • Day pack:25–35 liters with a hip belt.
  • Trekking poles:Reduce strain on knees and help with balance.
  • Water bottles and bladder:You’ll drink 3–4 liters daily.

Try everything out before you leave. Blisters or poorly fitted packs can ruin a trek.

Take Care of Your Body During the Climb

Even if you train perfectly, you have to look after yourself on the mountain.

  • Stay hydrated.Dehydration makes altitude sickness worse.
  • Eat enough.Even when you don’t feel hungry, keep eating to fuel your body.
  • Rest when you can.Save your energy for the summit night.
  • Tell your guide how you feel. They can help adjust your pace or recommend breaks.

Manage Altitude Sickness

Almost everyone feels the effects of altitude. Mild headaches and shortness of breath are common.

To reduce risk:

  • Ascend slowly.  
  • Drink water regularly.
  • Avoid alcohol and smoking.
  • Take Diamox if your doctor recommends it.

If you have severe symptoms, like confusion, loss of coordination, or trouble breathing, descend immediately. Your safety always comes first.

Tips to get through it:

  • Layer up.You’ll warm up as you climb, but the start is bitterly cold.
  • Take small sips of water.
  • Eat a snack when you take breaks.
  • Focus on your breathing.
  • Remember why you came.

Final Thoughts

Preparing for Kilimanjaro isn’t just about fitness or gear. It’s about building confidence, patience, and respect for the mountain. If you train steadily, listen to your guides, and stay positive, you’ll have a strong chance of reaching the summit. More importantly, you’ll come home with memories and a sense of accomplishment that lasts far beyond the trip.  

Mount Kenya is a place that never feels ordinary. Rising over 5,000 meters, this massive peak has deep valleys, high ridges, glaciers, and trails that wind through some of Africa’s most beautiful landscapes.

If you love adventure, you’ll find more than just one way to experience this mountain. From technical climbs to gentle treks and wildlife encounters, Mount Kenya has something for every outdoor spirit.

Here’s a guide to some of the best adventures to try on this incredible mountain.

1. Trekking to Point Lenana

Point Lenana is the third-highest peak on Mount Kenya and the most accessible summit for trekkers. At 4,985 meters, it offers serious altitude without technical climbing.

The trek is challenging but doesn’t require ropes or climbing gear. Routes like Sirimon, Chogoria, and Naro Moru each offer their own unique experience.

  • Sirimon Route: Known for gentler gradients and scenic moorlands.
  • Chogoria Route: Famous for dramatic views, waterfalls, and the Gorges Valley.
  • Naro Moru Route: Shorter but steeper, with sections like the Vertical Bog.

Most trekkers spend 4–5 days on the trip to acclimatize properly. Sunrise from Point Lenana feels magical. You’ll see Batian and Nelion glowing orange as the sun hits the snow.

2. Climbing Nelion and Batian

For experienced climbers, summiting Nelion (5,188 m) and Batian (5,199 m) is the ultimate goal. These peaks are serious undertakings, involving long, technical rock routes. The most common routes:

  • Nelion:South-East Face Normal Route. About 18 pitches of solid granite, graded UIAA IV+.
  • Batian: North Face Standard Route. Also technical, with exposed rock and glacier approach.

These climbs need skill, preparation, and time. Most teams spend a night at the Austrian Hut before making their attempt. Some climbers even cross the Gates of the Mist to stand on both Nelion and Batian on the same trip.

3. Exploring the Gorges Valley

If you prefer less altitude and more exploring, the Gorges Valley is perfect. This area feels hidden compared to the main trekking routes. Here you’ll find:

  • Towering cliffs
  • Alpine lakes
  • Quiet trails where you might not see another person all day

It’s a good place for day hikes or as part of a longer Chogoria Route trek. Keep your camera ready, this valley is rich with giant groundsel and everlasting flowers.

4. Camping by Lake Michaelson

Lake Michaelson sits in a deep basin beneath the cliffs of the peaks. It’s one of the most beautiful spots on the mountain. Camping here feels remote and peaceful. You’ll wake up to reflections of the peaks on the water and fall asleep to the sound of wind in the grass. Many trekkers on the Chogoria Route spend a night here before continuing to Point Lenana. Even if you don’t plan a summit, Lake Michaelson is worth the effort.

5. Wildlife Watching

Mount Kenya isn’t just about rock and ice. Its lower slopes hold some of the country’s most diverse wildlife. If you’re patient, you might see:

  • Colobus monkeys leaping between trees
  • Bushbucks and duikers in the forest
  • Buffalo grazing in clearings
  • Hyraxes sunning themselves on rocks

Birdlife is just as rich. Keep an eye out for sunbirds, eagles, and turacos as you hike.

6. Rock Climbing and Bouldering

If you enjoy climbing but don’t want to go all the way to the summits, there are plenty of rock walls and boulders around Shipton’s Camp and the Austrian Hut. The granite here is solid, and many climbers spend extra days practicing or warming up. You’ll find routes of all grades, from beginner-friendly scrambles to steep, technical pitches.

7. Mountain Biking the Lower Slopes

Few people realize you can mountain bike in the forests and foothills around Mount Kenya. Local tour companies offer guided rides through bamboo thickets and high-altitude moorland.

Trails can be rough and muddy, but they’re rewarding. It’s a unique way to see the mountain’s lower ecosystems and cover more ground in a day.

8. Fly Fishing in Mountain Streams

For something gentler, try fly fishing in the cold streams that run down from Mount Kenya’s glaciers. Rainbow trout thrive in these clear waters. Permits are required, but local lodges can help arrange everything you need. A day spent fishing with the peaks overhead is hard to beat for quiet adventure.

How to Prepare for Any Mount Kenya Adventure?

No matter which adventure you choose, a few basics will help you stay safe and make the most of your trip.

Acclimatize Slowly:
Altitude sickness can affect anyone. Take time to adjust, drink lots of water, and don’t rush.

Train Ahead:
 Even moderate treks are tougher at altitude. Build fitness with hiking, cardio, and strength training before you travel.

Pack Smart:
Bring layers for cold nights and hot days. Good boots, rain gear, and a warm sleeping bag are essential.

Hire Local Guides:
Guides make navigation safer, share local knowledge, and help you connect with the culture.

Respect the Environment:
Pack out all trash. Stay on trails. Keep noise down to avoid disturbing wildlife.

Check the Weather:
Conditions can change fast. Always carry a rain jacket and be ready to adjust your plans.

Why Mount Kenya Belongs on Your Bucket List?

Mount Kenya offers something you won’t find anywhere else. You can stand on a glacier in the morning, explore alpine meadows by lunch, and walk through bamboo forests by evening. Its adventures can be as hard or as gentle as you like. Whether you’re summiting Batian or relaxing by Lake Ellis, you’ll feel the same sense of wonder. This mountain rewards curiosity. Every trail, valley, and cliff has a story waiting for you.

Final Thoughts

Mount Kenya isn’t just a place to visit, it’s a place to experience. Each adventure here teaches you something. Maybe it’s how strong you are after a long climb. Maybe it’s the way the stars look over the Gorges Valley. Or maybe it’s the kindness of a guide who shows you the quiet paths.  Whatever draws you here, be ready to come home changed. The mountain has a way of staying with you. If you love the outdoors, start planning your trip now. Mount Kenya has a thousand adventures. All you have to do is choose.

Mount Kenya feels like a world apart. Its highest summits, Batian, Nelion, and Point Lenana, rise above forests and clouds. For many climbers, Nelion is the true prize. At 5,188 meters, Nelion is not just a long hike. It’s a technical climb that tests your skills and patience. If you’re planning to stand on this peak, good preparation is key. Here are some practical tips to help you get ready and climb safely.

What Makes Nelion Different?

Unlike Point Lenana, which trekkers reach without ropes, Nelion needs technical skill. The route up the South-East Face has about 18 pitches on solid granite.

Some parts feel like easy scrambling, while others are steep and exposed. Snow or ice can cover sections near the summit. You have to be steady and comfortable with heights. Because fewer people attempt Nelion, it feels more remote. The mountain demands respect.

Best Time to Climb

Weather matters here. The best months are July through early September. Conditions are drier, and the rock stays safer. January and February can also be good. But storms pop up fast. Clear skies in the morning can vanish by noon. Always build a few spare days into your plan. Waiting out bad weather is part of the experience.

Skills You Need

Nelion isn’t a place to learn basic climbing. Before you go, be sure you can:

  • Climb multi-pitch routes confidently
  • Place gear and set anchors
  • Belay safely in exposed spots
  • Rappel without stress
  • Move on snow if needed

If you’re unsure about any of these, spend time with a guide or take a course first. It’s worth it.

Fitness Counts

Even skilled climbers can struggle without fitness. You’ll be moving all day at high altitude with a pack on your back. Three months before your trip, start training:

  • Go on long hikes with a loaded backpack
  • Run, cycle, or swim for cardio
  • Do leg and core exercises
  • Practice climbing on real rock

The fitter you are, the safer and more enjoyable the climb will feel.

Acclimatize Slowly

Altitude can sneak up on you. Even if you’re strong, you may feel tired, dizzy, or sick. Take your time going up:

  • Day 1: Hike to Old Moses Camp (3,300 m)  
  • Day 2: Walk to Shipton’s Camp (4,200 m)
  • Day 3: Rest and take short walks higher
  • Day 4: Move to Austrian Hut (4,790 m)
  • Day 5: Summit day

Drink plenty of water. Eat well. If you feel unwell, stop and rest. Listen to your body.

Hire a Guide You Trust

You don’t have to climb Nelion with a guide. But most people do, and it’s a smart choice.

A local guide knows:

  • The route’s hidden anchors
  • When the weather is turning
  • How to adjust the plan safely

Ask your guide about their experience. Make sure you feel comfortable with their style. A good guide makes the climb safer and more enjoyable.

What to Pack

Here’s a simple checklist to help you get ready:

  • Clothes:
  • Thermal base layers
  • Warm fleece or jacket
  • Down jacket
  • Waterproof shell
  • Hat and gloves

Footwear:

  • Mountaineering boots
  • Approach shoes

Climbing Gear:

  • Helmet
  • Harness
  • Belay device
  • Carabiners
  • Crampons (if needed)
  • Ice axe (sometimes helpful)

Other:

  • Sunglasses
  • Sunscreen
  • Headlamp
  • Water bottles
  • High-energy snacks
  • First aid kit

Ask your guide what gear they provide so you don’t pack too much.

Know the Route

Most people climb the South-East Face Normal Route. It starts from the Austrian Hut and follows granite pitches to the top. You’ll cross sections of snow or ice if conditions call for it. Many climbers reach the summit and rappel down in one long day. Some prefer to bivouac near the top. Talk to your guide about which plan fits you best. Moving too fast or too slow can be risky.

Manage the Descent

Many accidents happen on the way down. Fatigue, cold hands, and fading light make rappelling tricky. Take your time. Double-check anchors and knots. Communicate clearly with your guide or partner. If you start early, you’ll have daylight for most of the descent.

Eat and Drink Often

High altitude and long hours burn energy fast. Bring snacks you like and will eat even when tired. Sip water regularly. Dehydration increases the risk of altitude sickness. Small, steady meals keep your strength up all day.

Watch the Weather

Always keep an eye on the sky. If you see clouds building or feel the wind shift, be ready to change plans. Mount Kenya’s weather can turn quickly. Respect it. No summit is worth pushing into a storm.

Use a Simple Schedule

Here’s a sample six-day plan:

Day 1: Drive to Sirimon Gate, hike to Old Moses Camp
 Day 2: Trek to Shipton’s Camp
 Day 3: Rest and acclimatize
 Day 4: Hike to Austrian Hut
 Day 5: Summit attempt
 Day 6: Descend and return to Nairobi

Add extra days if you can. Flexibility helps you stay safe.

Stay Calm and Focused

Nelion requires patience. Break the climb into small parts. Focus on the next pitch instead of thinking about the summit. When you feel overwhelmed, take a breath. Look around. The mountain is beautiful. Staying present helps you climb better and keeps your mind steady.

Respect Your Limits

If you feel sick or exhausted, stop. Rest. If symptoms don’t improve, go down. Trust your instincts. Pushing too far is dangerous. Remember, turning back is smart, not failure.

Why Nelion Is Worth the Effort

Nelion is harder to reach than Point Lenana. That’s why it feels so rewarding. Standing on the summit, you’ll see Batian beside you and the plains stretching out below. The cold air and quiet stay with you long after you leave. It’s a climb that teaches you patience and respect. That’s what makes it special.

Final Thoughts

Climbing Nelion is no small goal. But with preparation and the right mindset, it’s an unforgettable adventure. Train well. Acclimatize slowly. Climb with people you trust. When you stand on top, you’ll know every step was worth it.

Mount Kenya is one of Africa’s most striking places. Its highest summit, Batian, rises to 5,199 meters. While many trekkers reach Point Lenana without ropes, Batian is in a different league. This climb demands skill, planning, and a steady mind.

If you’re thinking about taking it on, this guide will help you prepare. These tips cover everything from fitness to mindset, so you can stand on top feeling ready and proud.

Know What Makes Batian Unique

Most people think of Kilimanjaro when they picture African peaks. But Mount Kenya has a wilder feel. There are no big crowds here. The terrain changes constantly, from forests and moorlands to glaciers and steep granite walls.

Batian isn’t a trekking peak. The North Face Standard Route requires about 18 pitches of climbing. It’s graded around 5.9 (UIAA IV+), so you need to be comfortable on technical rock. Some parts are exposed, and the weather shifts quickly.

If you reach the summit, you’ll be part of a small group who have stood on Kenya’s highest point. That alone makes the effort worth it.

Choose the Right Time

The best months are July through early September. During this dry season, the rock stays cleaner and less icy. January and February can also be good, but you need to watch forecasts closely. Mount Kenya has its weather system. Storms can roll in within hours. Whenever you go, build flexibility into your schedule. Have an extra day or two in case you need to wait out poor conditions.

Train Well Before You Arrive

Many climbers underestimate how much fitness matters. Climbing at altitude with a heavy pack is different from a day hike. You’ll need strength, endurance, and balance.

About three months before your trip, start training. Work on:

  • Cardio: hiking, running, or cycling.
  • Strength: squats, lunges, and core exercises.
  • Climbing: practice on real rock, not just in the gym.
  • Carrying weight: train with a loaded pack.

The more you prepare, the more energy you’ll have to focus on each move instead of fighting fatigue.

Acclimatize Slowly

Altitude sickness can hit anyone. Even if you’re fit, your body needs time to adjust to thinner air.

Plan your approach carefully:

  • Day 1: Walk to Old Moses Camp (3,300 m).
  • Day 2: Hike to Shipton’s Camp (4,200 m).
  • Day 3: Rest, hydrate, and take short walks higher up.
  • Day 4: Start your summit push.

Use the climb-high, sleep-low method. It helps your body create more red blood cells and cope better with less oxygen.

Hire a Trusted Guide

While it’s legal to climb Batian without a guide if you’re qualified, most people don’t. A local guide knows the safest lines, hidden anchors, and how to read the mountain’s moods.

When you look for a guide, ask:

  • How often do you guide Batian?
  • What’s included in your service (gear, meals, porters)?
  • What happens if the weather turns bad?

A good guide is more than a leader. They’re your safety net and your teammate.

Bring the Right Gear

Batian demands a mix of mountaineering and technical climbing gear. Here’s a checklist to start:

       Clothing:

  • Warm base layers.
  • Insulating mid-layer.
  • A down jacket for camp and cold mornings.
  • Waterproof shell.
  • Gloves and a hat.

    Footwear:
  • Mountaineering boots that fit crampons.
  • Approach shoes if you prefer for the lower sections.

    Climbing Equipment:

  • Belay device.
  • Locking carabiners.
  • Ice axe and crampons.

    Other:

  • Sunglasses and sunscreen.
  • Headlamp with spare batteries.
  • Water bottles or a hydration bladder.
  • High-energy snacks.
  • A small first-aid kit.

Ask your guide what they provide. It helps avoid carrying extra weight.

Learn the Route

Most teams use the North Face Standard Route. It starts with a glacier approach, then climbs steep granite pitches. You’ll find exposed ridges and sections that feel endless.

Some parties summit and descend in one long day. Others bivouac near the top and finish the next morning. Talk with your guide about which plan fits your fitness and comfort. Moving too fast can drain you. Moving too slow can risk afternoon storms.

Keep Hydrated and Fed

Dehydration makes altitude sickness more likely. Sip water all day. Even when you don’t feel thirsty, drink. Pack snacks you like and will eat even when tired. Dried fruit, nuts, and energy gels work well. Eat small bites often to keep your energy up.

Watch the Weather

Mount Kenya’s weather changes fast. Clear skies at dawn can turn stormy by noon. Start early to give yourself more time. Keep an eye on clouds, wind, and temperature drops. If your guide suggests turning back, listen. No summit is worth risking your life.

Know Your Limits

Batian isn’t a place to push past warning signs. If you feel dizzy, nauseous, or confused, stop. Tell your guide if you feel unwell. Sometimes a short rest and water help. Other times, descending is the only safe option. Be honest about your energy and mindset. Pride should never come before safety.

Break the Climb Into Sections

Looking up at the whole route can feel overwhelming. Break the day into small parts:

  • Getting to the glacier.
  • Climbing the first pitches.
  • Reaching the notch.
  • Moving toward the summit.

Focus on one section at a time. You’ll stay calmer and more focused.

Use a Sample 6-Day Plan

Many climbers follow this schedule:

 Day 1: Drive from Nairobi to Sirimon Gate. Hike to Old Moses Camp.
 Day 2: Trek to Shipton’s Camp.
 Day 3: Rest and acclimatize.
 Day 4: Summit attempt via the North Face. Return to Shipton’s or bivouac.
 Day 5: Complete the descent.
 Day 6: Walk out and drive back to Nairobi.

Having extra days gives you a buffer for weather or acclimatization.

Final Thoughts

Batian is a serious climb. But with the right preparation, it’s an adventure you’ll never forget. Train hard, find a guide you trust, and stay humble on the mountain. When you stand on top, you’ll feel a mix of relief, joy, and pride that only comes from real effort. Mount Kenya waits for those who respect it. If you’re ready, it can show you something remarkable.

climbing Mt Kenya trekking

Mount Kenya is Africa’s second-highest mountain and a place full of rugged beauty. Many travelers know Kilimanjaro, but fewer make it here. That’s a big reason why climbing Batian feels so special. It’s not crowded. It’s raw. It asks a lot, and rewards you even more.

Batian rises to 5,199 meters. Unlike Point Lenana, which is a trekking peak, Batian is a technical climb. You’ll need skill, confidence, and good fitness. If you’re thinking about trying, this guide will help you get ready.

Why Batian Stands Apart

Batian isn’t just the highest point on Mount Kenya. It’s a climb that feels honest. No shortcuts. No easy trails to the top. You earn every meter. When you stand on Batian’s summit, you’ll see all three peaks, Batian, Nelion, and Lenana, together. You’ll look down on glaciers and far out over the plains. The view is as big as it gets.

Most of all, you’ll feel proud. Few people reach this point each year. It takes planning and heart.

The Normal Route

The North Face Standard Route is the most common way up. It’s graded about 5.9 (UIAA IV+). You’ll need to be comfortable climbing rock at that level.

The route has:

  • About 18 pitches of rock.
  • A glacier approach, depending on the season.
  • Big exposure in many spots.
  • Sections that can be hard to follow.

Most climbers do the route over two days. Some bivouac on the mountain, but it makes logistics more complex. 

Skills You Need:

Climbing Batian is very different from hiking to Point Lenana. This is a true alpine route with long pitches and real exposure. You can’t rely on a simple trail. Instead, you’ll need solid climbing skills, good balance, and confidence using ropes on steep rock. Even if you hire a guide, you must be prepared. Knowing what to expect helps you stay safe and enjoy this unique mountain challenge.

  • Multi-pitch rock climbing experience.
  • Knowledge of alpine rope work.
  • Good balance and confidence at height.
  • Strong fitness.

Even if you hire a guide, you’ll be moving all day. You’ll carry your gear, water, and snacks. Staying steady under pressure is key.

When to Climb?

The best months are July through September. The weather is more settled, and the rock is usually dry. January and February can also work, but storms are less predictable. Mount Kenya creates its weather. Clear mornings can turn stormy by noon. Try to build some flexibility into your plans in case you need to wait for safe conditions.

Permits and Guides

All climbers need a park permit. Fees are different for residents and visitors. Hiring a guide isn’t mandatory if you’re qualified, but most people do. Local guides know the mountain’s details, weather shifts, route choices, and safe camps. Look for a certified guide with a proven record on technical climbs here. Ask questions before you book.

Getting Used to the Altitude

Altitude is often the biggest surprise for climbers. Even fit people can feel tired fast if they don’t acclimate. A good approach:

  • Day 1: Hike to Old Moses Camp (3,300m).
  • Day 2: Trek to Shipton’s Camp (4,200m).
  • Day 3: Rest and take short walks to higher spots, then sleep low.

Spending a few days getting used to the elevation makes the climb safer and more enjoyable.

What to Pack?

This is a mixed route, rock, ice, and snow. You’ll need both mountaineering and climbing gear:

       Clothing:

  • Warm base layers.
  • A down jacket.  
  • Waterproof outer layer.
  • Hat and gloves.

    Footwear:

  • Mountaineering boots that fit crampons.
  • Approach shoes if you prefer for the lower sections.

    Climbing Gear:

  • Belay device.
  • Locking carabiners.
  • Crampons and ice axe.

    Other Essentials:

  • Headlamp and extra batteries.
  • Water bottles or a bladder.
  • High-energy snacks.
  • Personal first aid kit.  

Guides usually provide ropes and protection. Always check in advance. 

A Sample 6-Day Plan

Planning your days helps you move with confidence. Here’s a common six-day schedule many climbers use to acclimatize, climb Batian, and return safely. Many teams use a schedule like this:

Day 1: Drive from Nairobi to Sirimon Gate. Hike to Old Moses Camp.
Day 2: Trek to Shipton’s Camp.
Day 3: Acclimatize and prepare gear.
Day 4: Start early, climb Batian: return or bivouac.
Day 5: Finish descent to Shipton’s.
Day 6: Walk out and return to Nairobi.

Staying Safe

Climbing Batian is serious. A few simple habits keep you safer:

  • Listen to your guide.
  • Respect the weather.
  • Drink plenty of water.
  • Eat small snacks often.
  • Watch for signs of altitude sickness.

Turn back if you feel unwell or if conditions change fast. The mountain will be there another day.

Training Tips

You’ll enjoy the climb more if you train ahead.

  • Do cardio workouts, running, hiking, and cycling.
  • Practice rock climbing on real stone, not just a gym wall.
  • Learn or refresh rope systems and rappels.
  • Train with a weighted pack on long hikes.

Aim to build strength, stamina, and skill.

Batian vs. Lenana

Point Lenana is a popular trekking peak. It’s beautiful and much easier, no ropes needed. But it doesn’t feel as wild. Batian is different. Fewer people go there. You’ll need skills and focus. That’s part of what makes it special. If you’re ready for a real alpine climb, Batian is worth the work.  

Final Reflections

Batian is not just a climb. It’s a test of patience and preparation. But it’s also a place of calm beauty. The glaciers, the views, and the early morning light stay with you long after you leave. If you start with respect and train with purpose, you’ll be ready.